Follow these steps to build your first event page on Treasure!Documentation Index
Fetch the complete documentation index at: https://docs.ontreasure.com/llms.txt
Use this file to discover all available pages before exploring further.
Basic Info
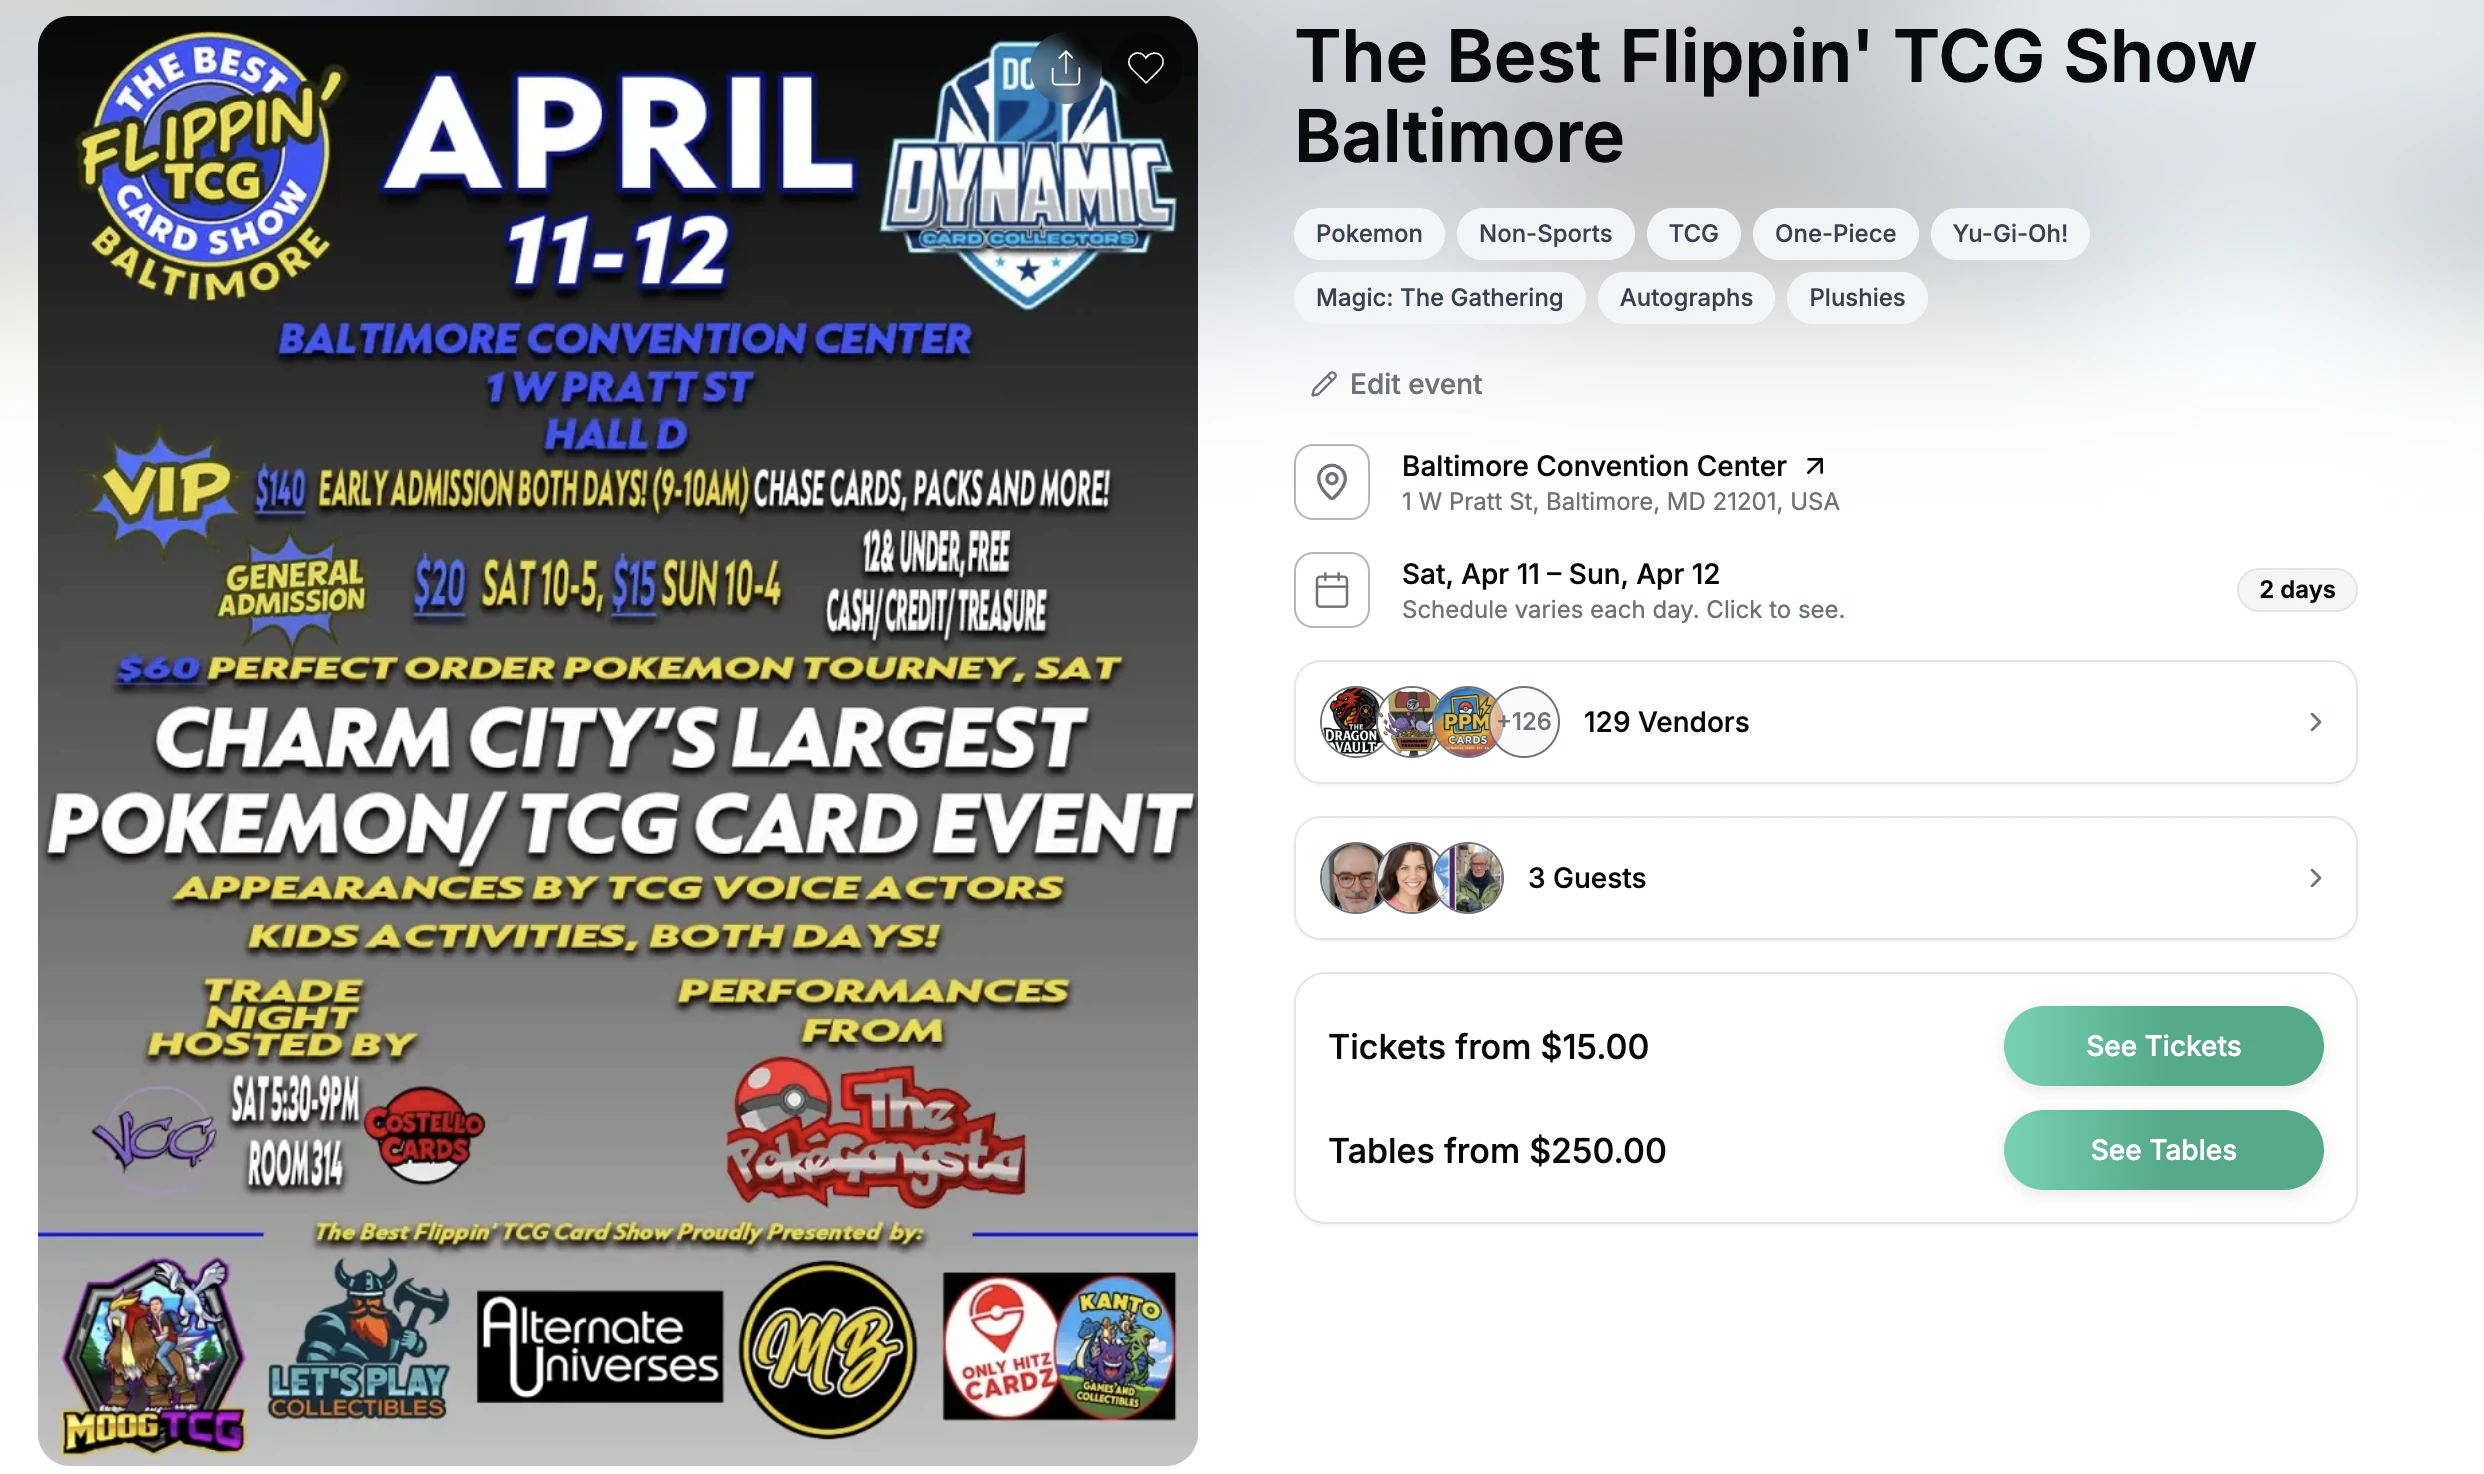
To start, you will be prompted to add information critical to your event, such as your:
- Event Name
- Venue Details
- Event Poster
- Description and Dates

Ticket and Table Tiers
Next, you have the ability to add information around the pricing of your tickets and tables, as well as additional questions for vendors. Within each ticket or table that you create, you can utilize tiered pricing to give your customers discounts bulk purchases.Here, you’re also able to switch whether you want to pass on processing fees to your customer (default) or absorb them. See more on fees here.For the vendor process, you also add information about check-in along with your terms & conditions and change your preferred vendor application type (learn more).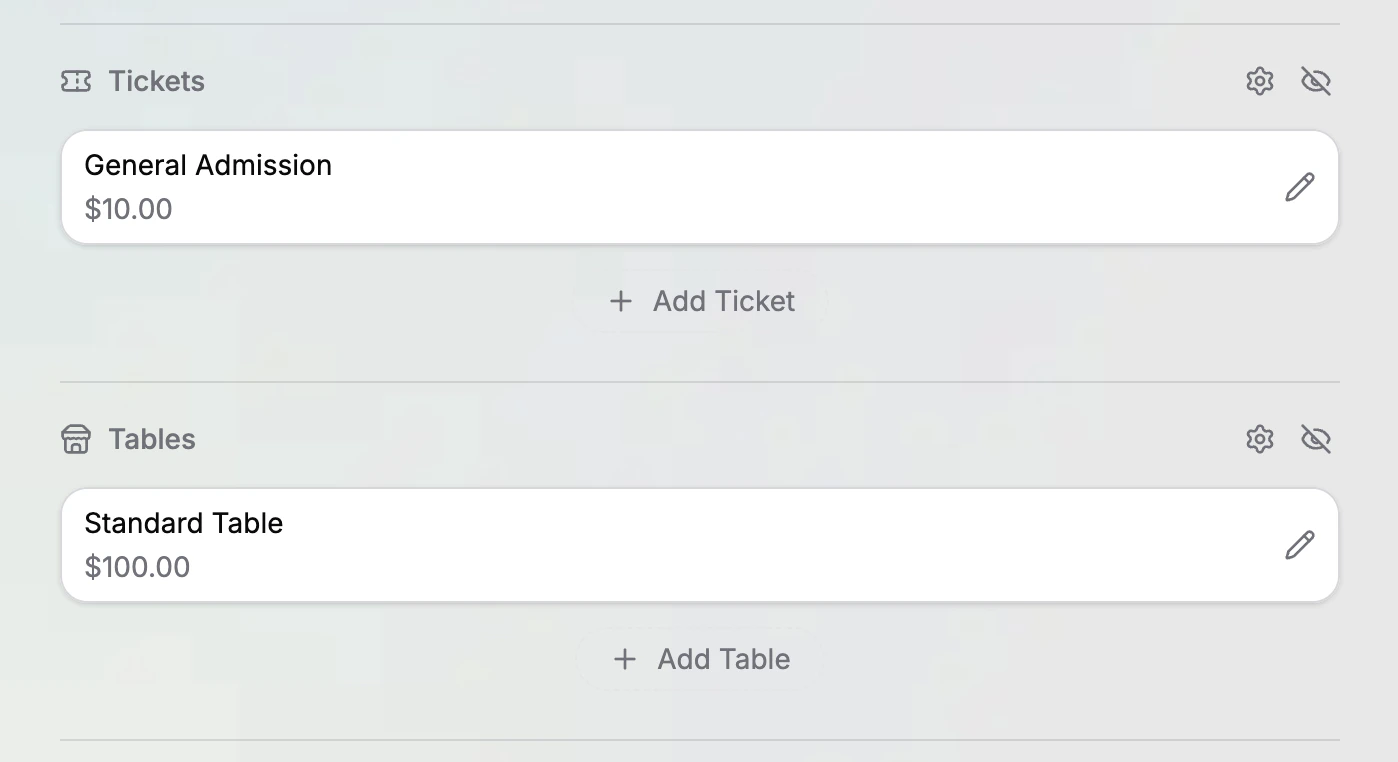
Additional Information
Finally, you can add:
- Tags that provide your audience context around what vendors at your event will be selling
- Special guest information to highlight guests from your
- Add-Ons for ticket or table purchases such as autograph tickets or additional showcases for vendors
- Custom Fees for your event
Try it out now!
Create your events on Treasure today for fre
Live Event Page
After you complete the create event process, you can publish your event and start processing sales right away. Your live event will include all the information you just input into the event editor.