
Before changing your application or checkout type, all pending applications require a response (approval or denial). This ensures a smooth experience for both vendors and organizers.
Password Protection
Password protection allows you to set a password that will be required for vendors to register for a table. By setting a password, you will NOT be making your event private. However, only those vendors with the password will be able to enter the table registration flow. This enables to keep your event details public while still having an exclusive vendor application process.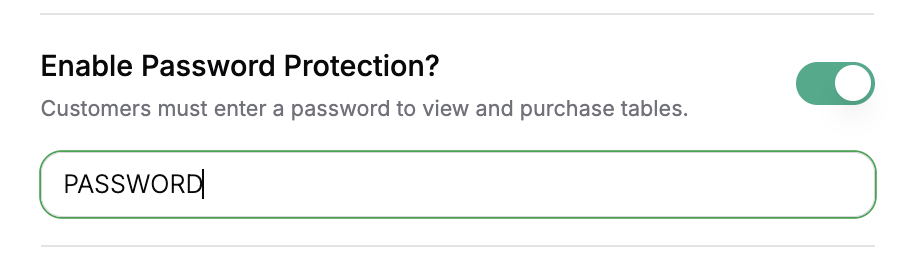
Cart Types
Standard Cart (default)
The standard cart prompts vendors to select their preferred table type from the table types you set when creating your event. Any description or add-ons that you include will also show up from this cart view. After selecting their table type, vendors are sent through the regular application flow that’s outlined in the vendor management guide.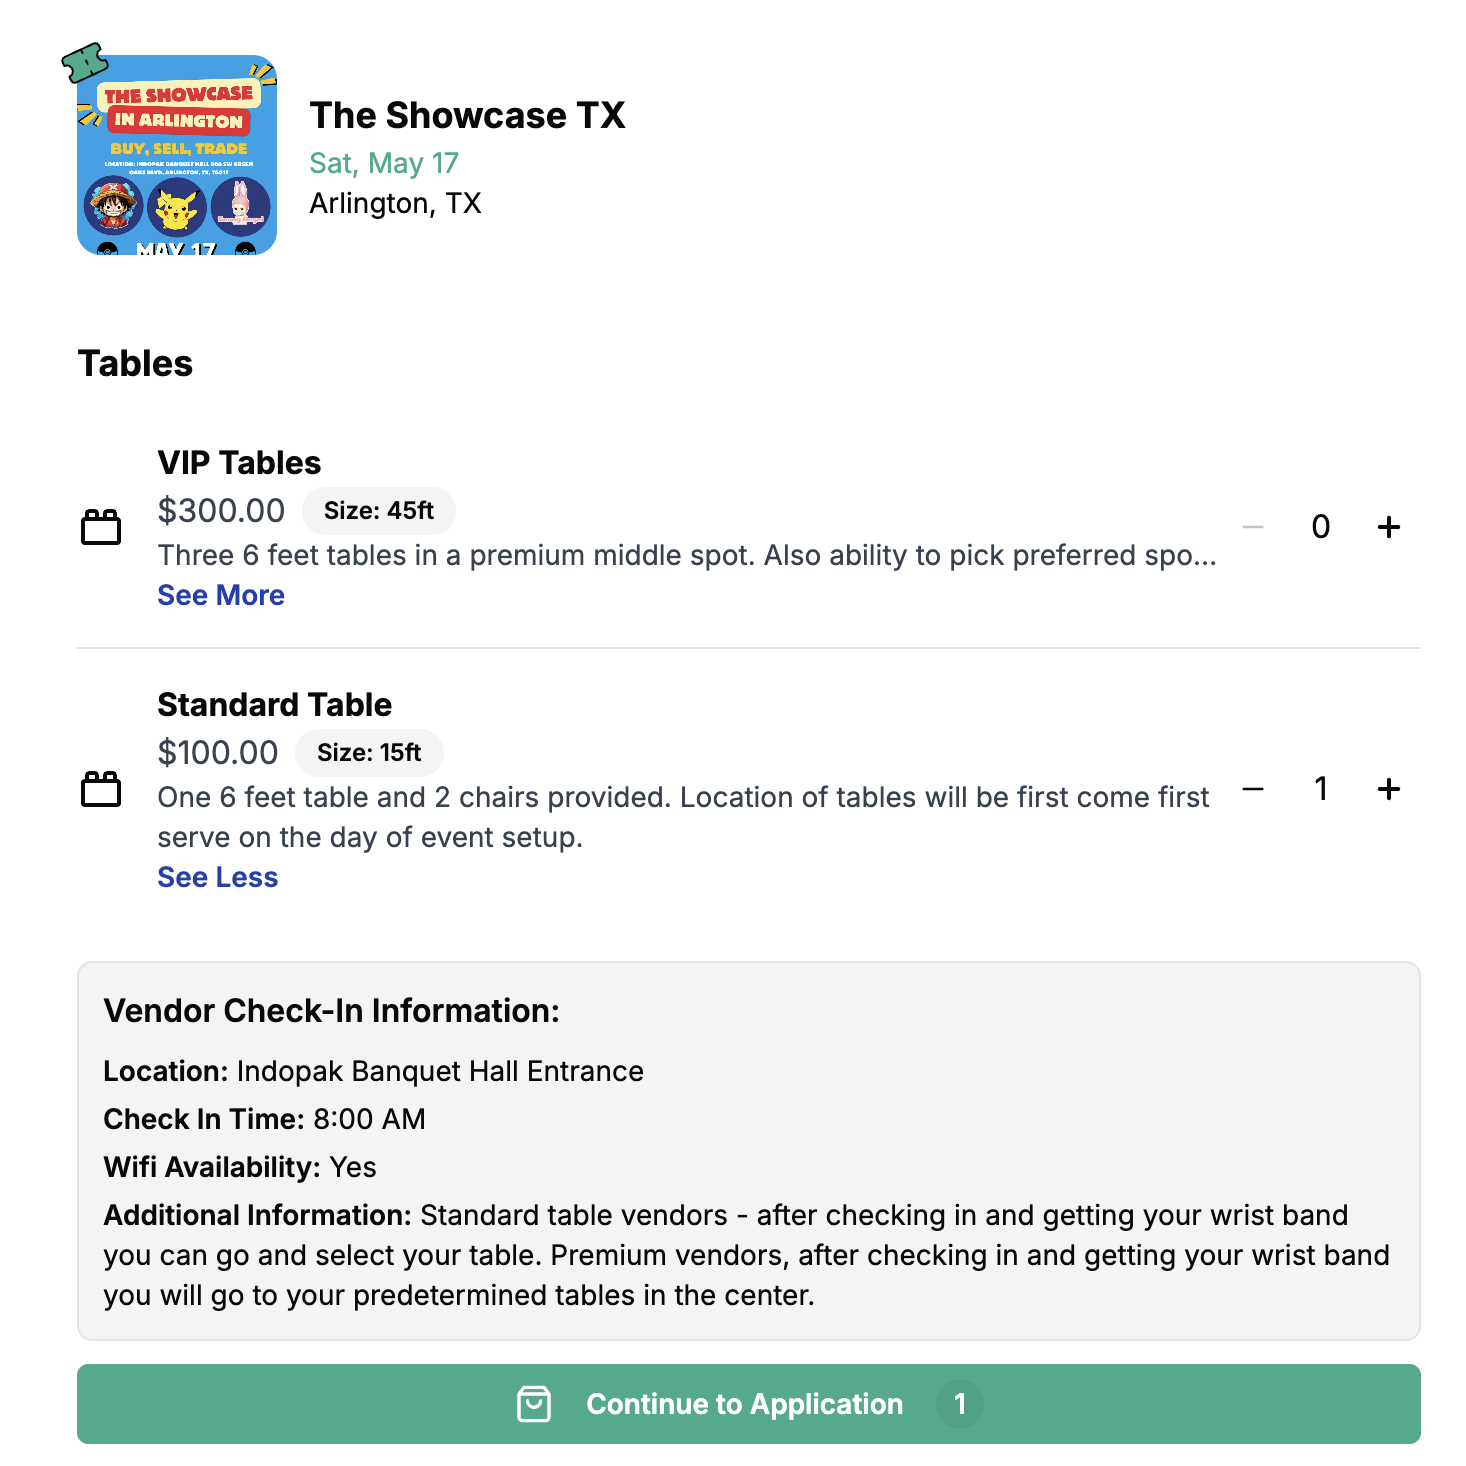
Table Select
Using Table Select allows vendors to select their own table during the application process. This requires a complete venue map, and, as a result, is only available for organizers that are subscribed to the Starter or Pro plan. Vendorrs select their table and are automatically assigned to the table on your venue map once approved. In both cart types, vendors are still required to input all basic application information.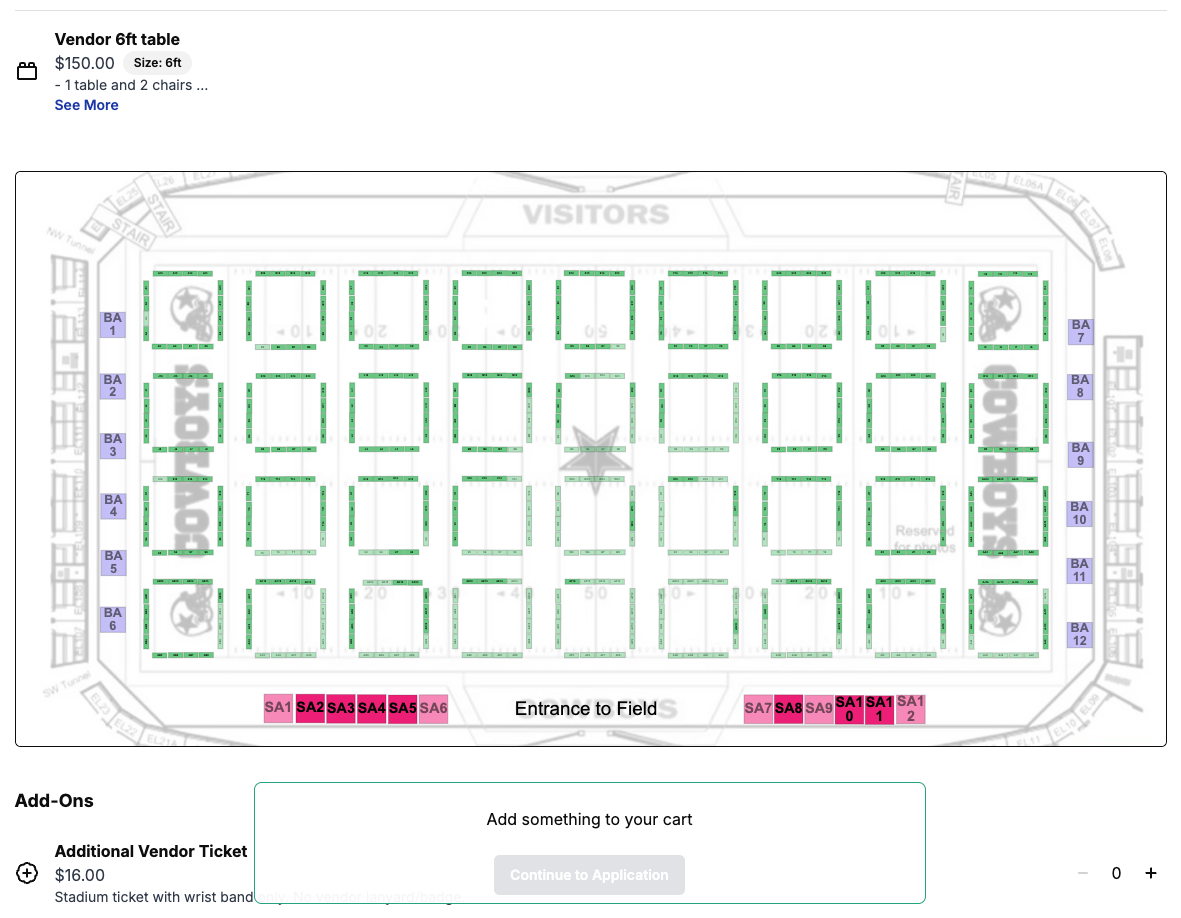
Checkout Types
Standard Checkout (default)
The standard vendor checkout only requires a vendor to input payment information after they’ve been approved. Once you as the organizer approve a vendors, application, they will receive an email and a text message with a secure checkout link that directs them to pay for the tables they have been approved for.AutoPay
AutoPay is a feature that allows event organizers to modify their vendor application process so the payment charge is initiated upon acceptance of a vendor application. Vendors save their preferred payment method during the application process and are only charged if accepted. See the full guide on AutoPay for more informationInstant Checkout
Instant checkout eliminates the vendor approval process and requires payment at the time of application. Immediately after a vendor completes their application, they are directed to the checkout screen to secure their table. If they do not checkout within 20 minutes of proceeding to the checkout page, their spot is released. In cases where Table Select is enabled, this will make the table available for purchase again.Hide Vendors Section
By default, the “Vendors” section on your event page is public. From the advanced settings, you are able to switch this on and off. Below is an example of the Vendors section visibile on a live event page.Keep in mind that if you have a live venue map, your vendors can also be showcased on the map, so you might not have a use for the Vendors section.
