
Pass on fees (default)
By default, the processing fees for each transaction associated with your events will be passed on to your customer. This means that you will receive the price you list your items at each time a sale is completed. This functions the same for tickets and tables.In the example below, the organizer listed their ticket price at $10. There was a processing fee of $1.53 associated with the order, and they maintain the default setting of passing on fees to their customer. As a result, their payout from this order would be $10 while the customer pays $11.53.

Absorb fees
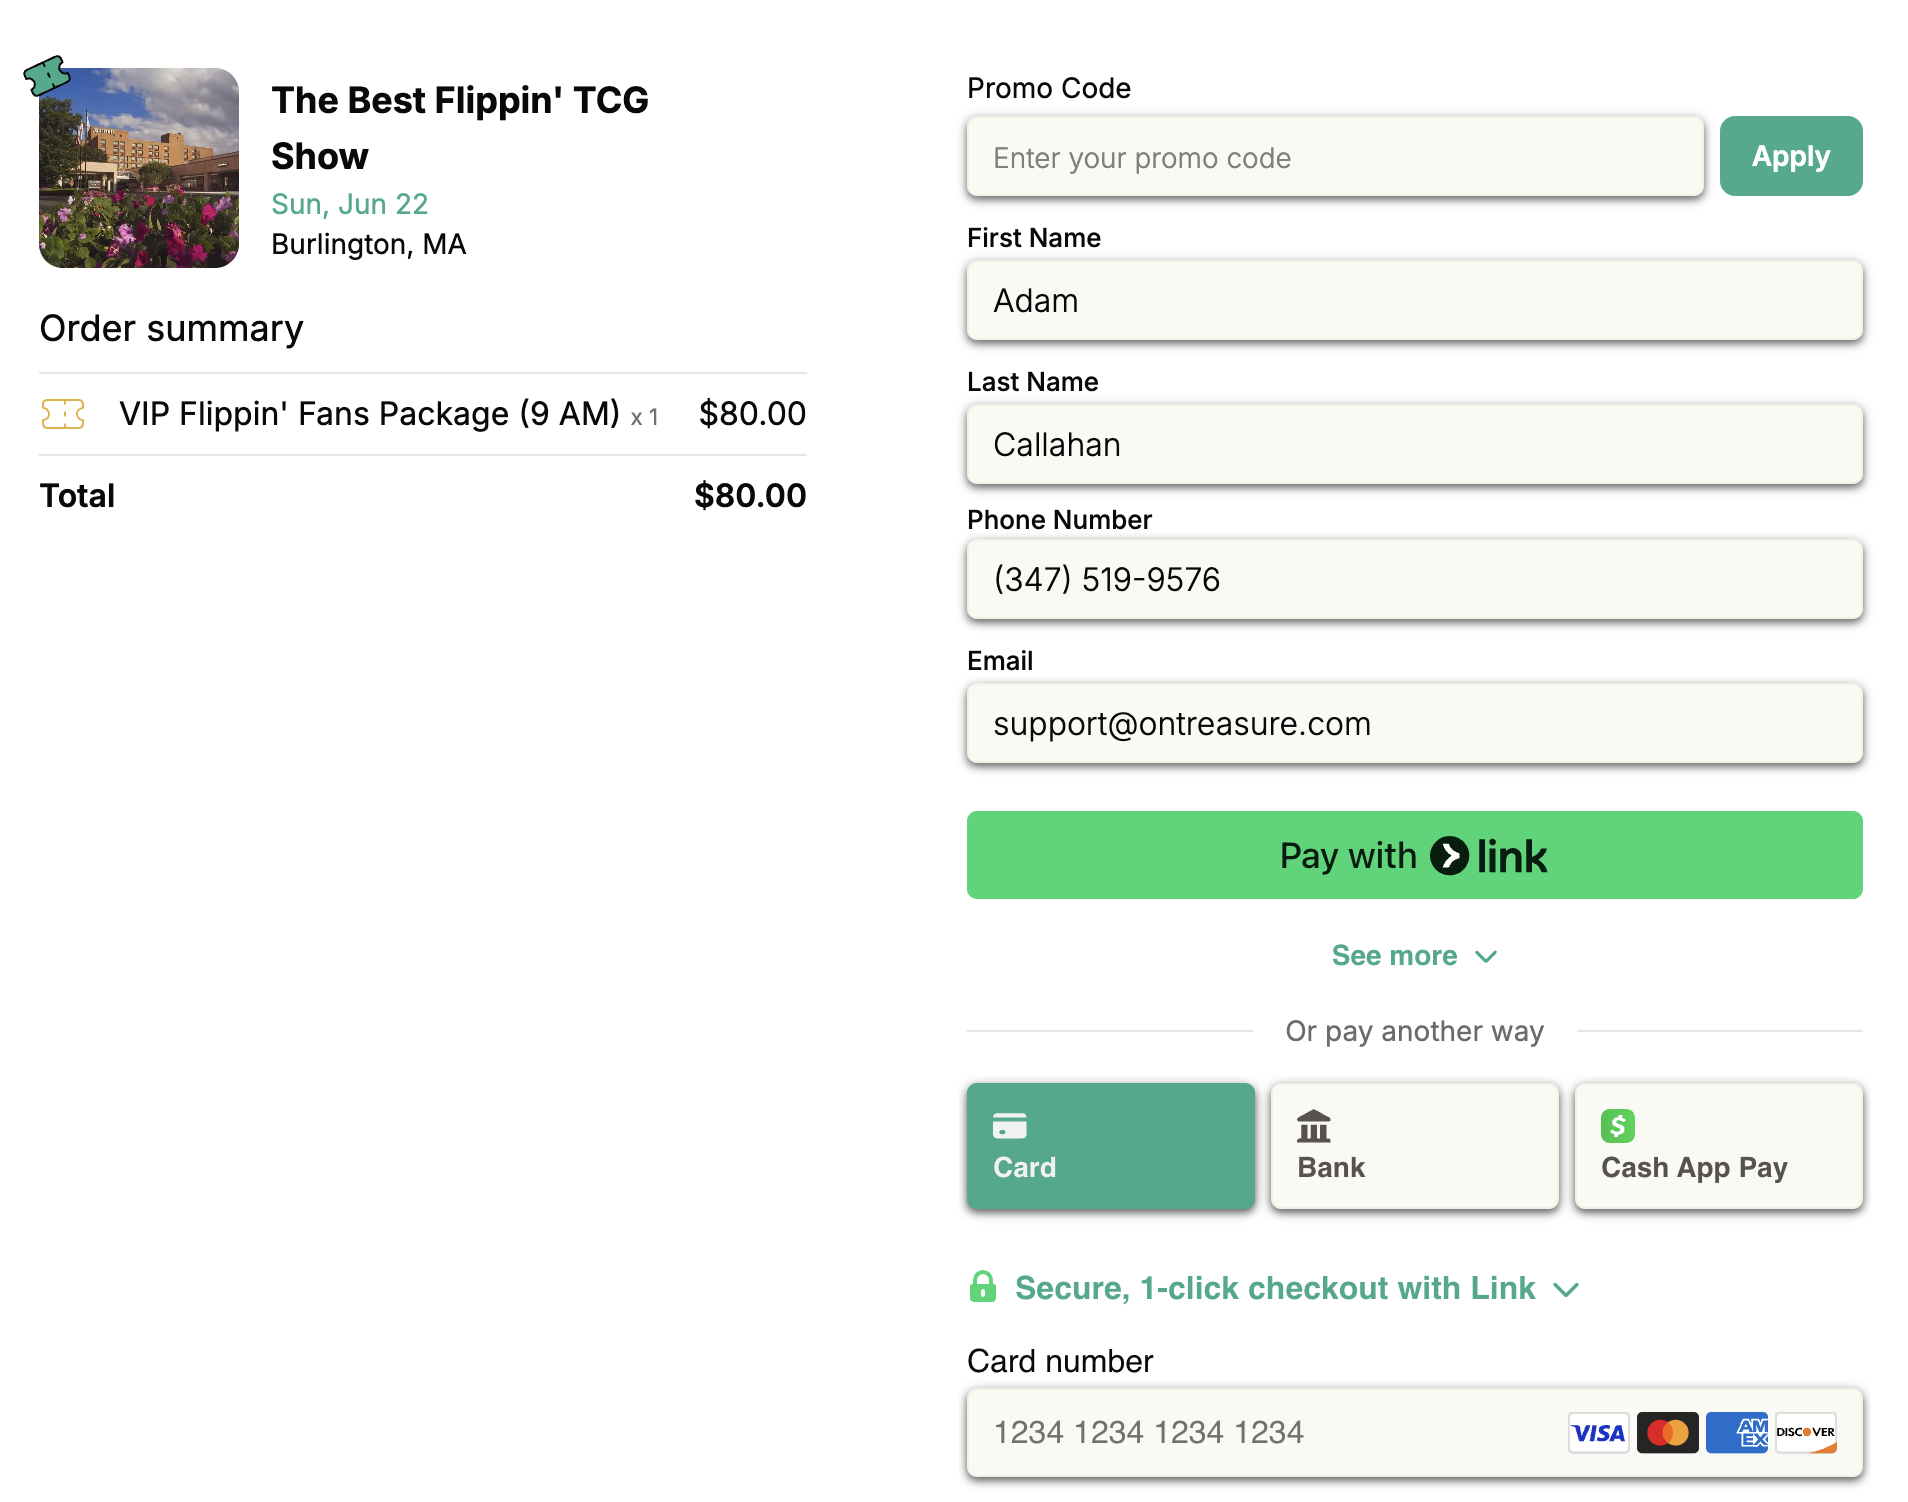
If you elect to absorb fees for either tickets or tables, your customer will not see any processing fee on their order during checkout. All the fees will be deducted from your final payout.In the example below, the organizer listed their ticket price at $80. Because this organizer elected to absorb the processing fees for their customer, the customer pays exactly $80. All the fees will be deducted from the organizers payout on the backend.
Custom Fees
You can also set your own fees from your event dashboard. To do this, follow the steps below:Open the Custom Fees page
Within the edit event section of your event dashboard, open the “Promo Codes & Fees” page.
Add a Fee
At the top right of the Custom Fees page, there is a section labeled “Custom Fees.” Here, you are able to create a new fee that you set on your own.