Documentation Index
Fetch the complete documentation index at: https://docs.ontreasure.com/llms.txt
Use this file to discover all available pages before exploring further.
Assign your vendors
After accepting the application for the vendor you want to highlight, you can assign them to a table in your venue map editor by clicking into “Vendor Assignments” in the top left corner of your map. This will expand the vendor assignment menu that includes a list of every accepted vendor as well as the tables they requested in their application. From this list, you are able to click into any vendor and assign them to tables on your newly created map. For information on how to accept vendors or edit your map you can see the relevant guides (vendor management or venue mapping).
Highlight your vendors
Once you’ve selected which vendor you want to highlight from the vendor assignments menu, click the star icon in the top right of the specifc vendor’s page to add them to your map highlights section.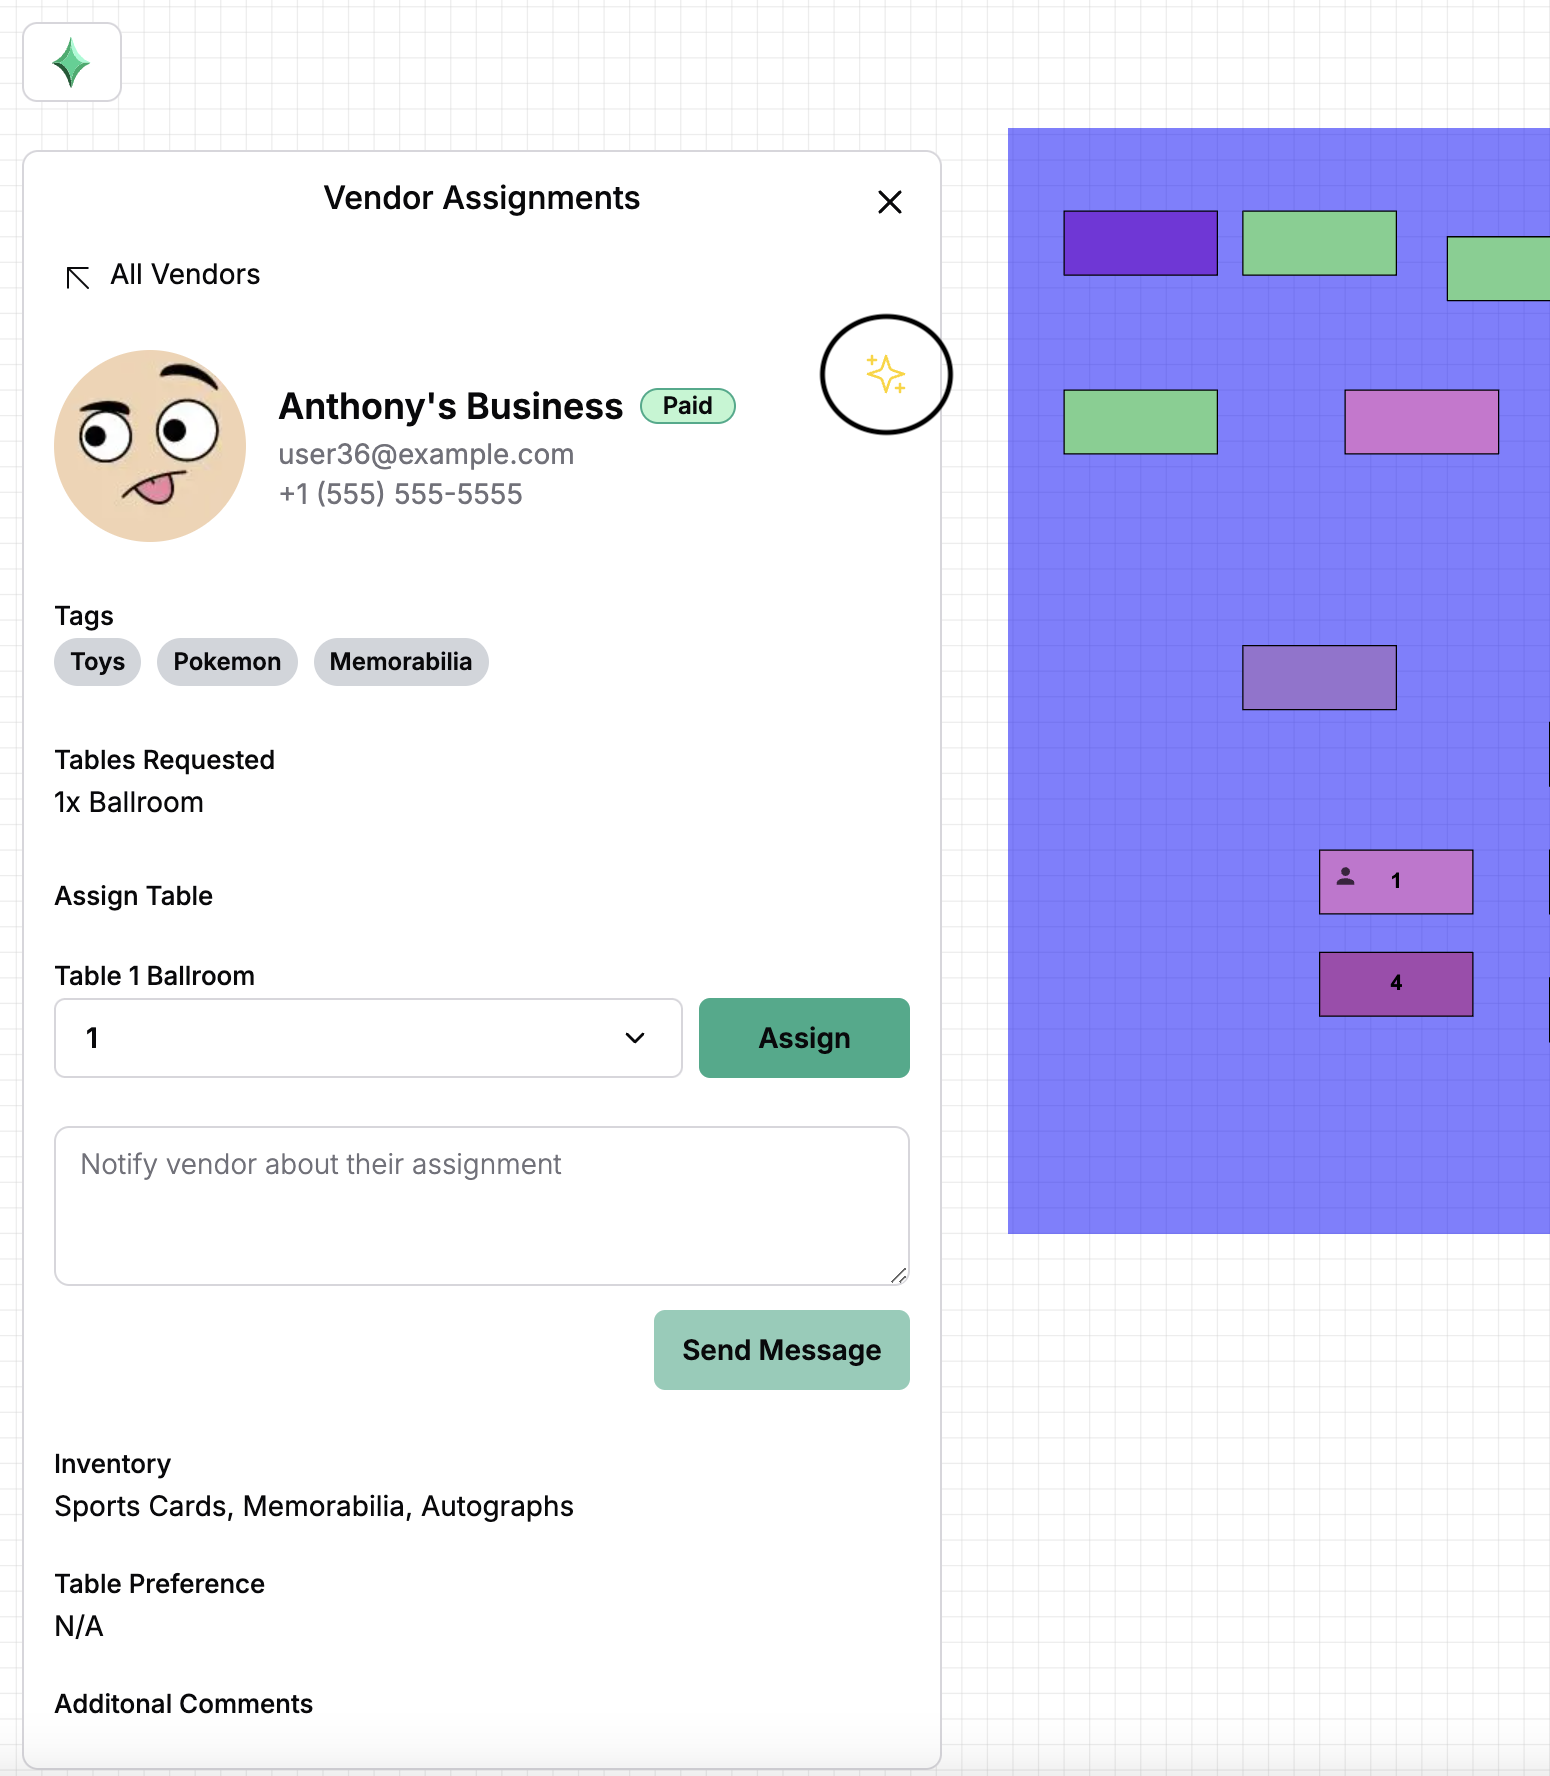
Set the order of highlights
When you highlight multiple vendors, you are able to set the order that they appear on your live venue map. When your desired order is set, make sure to save the changes and publish your map to your event page to make it go live.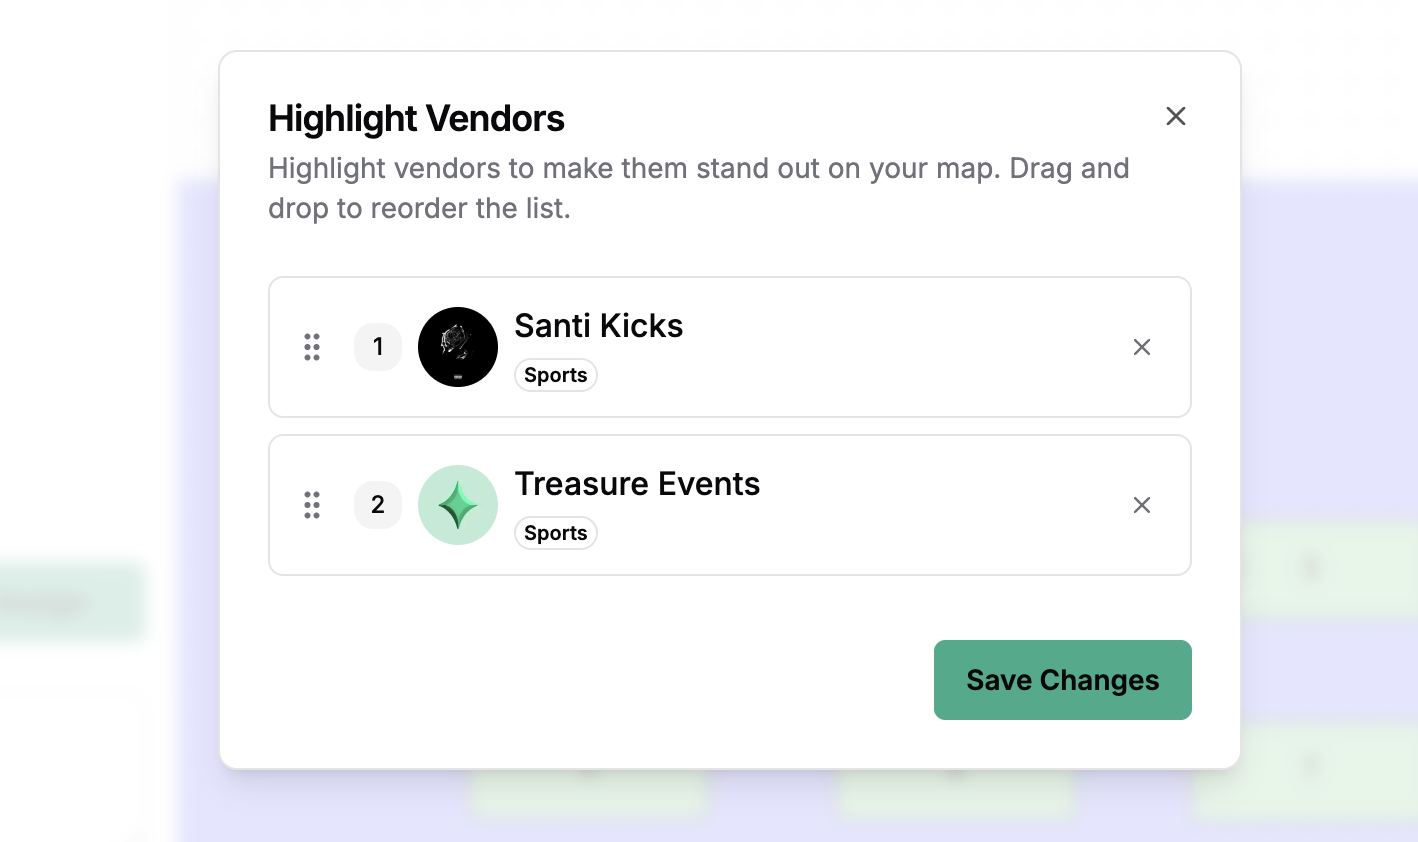
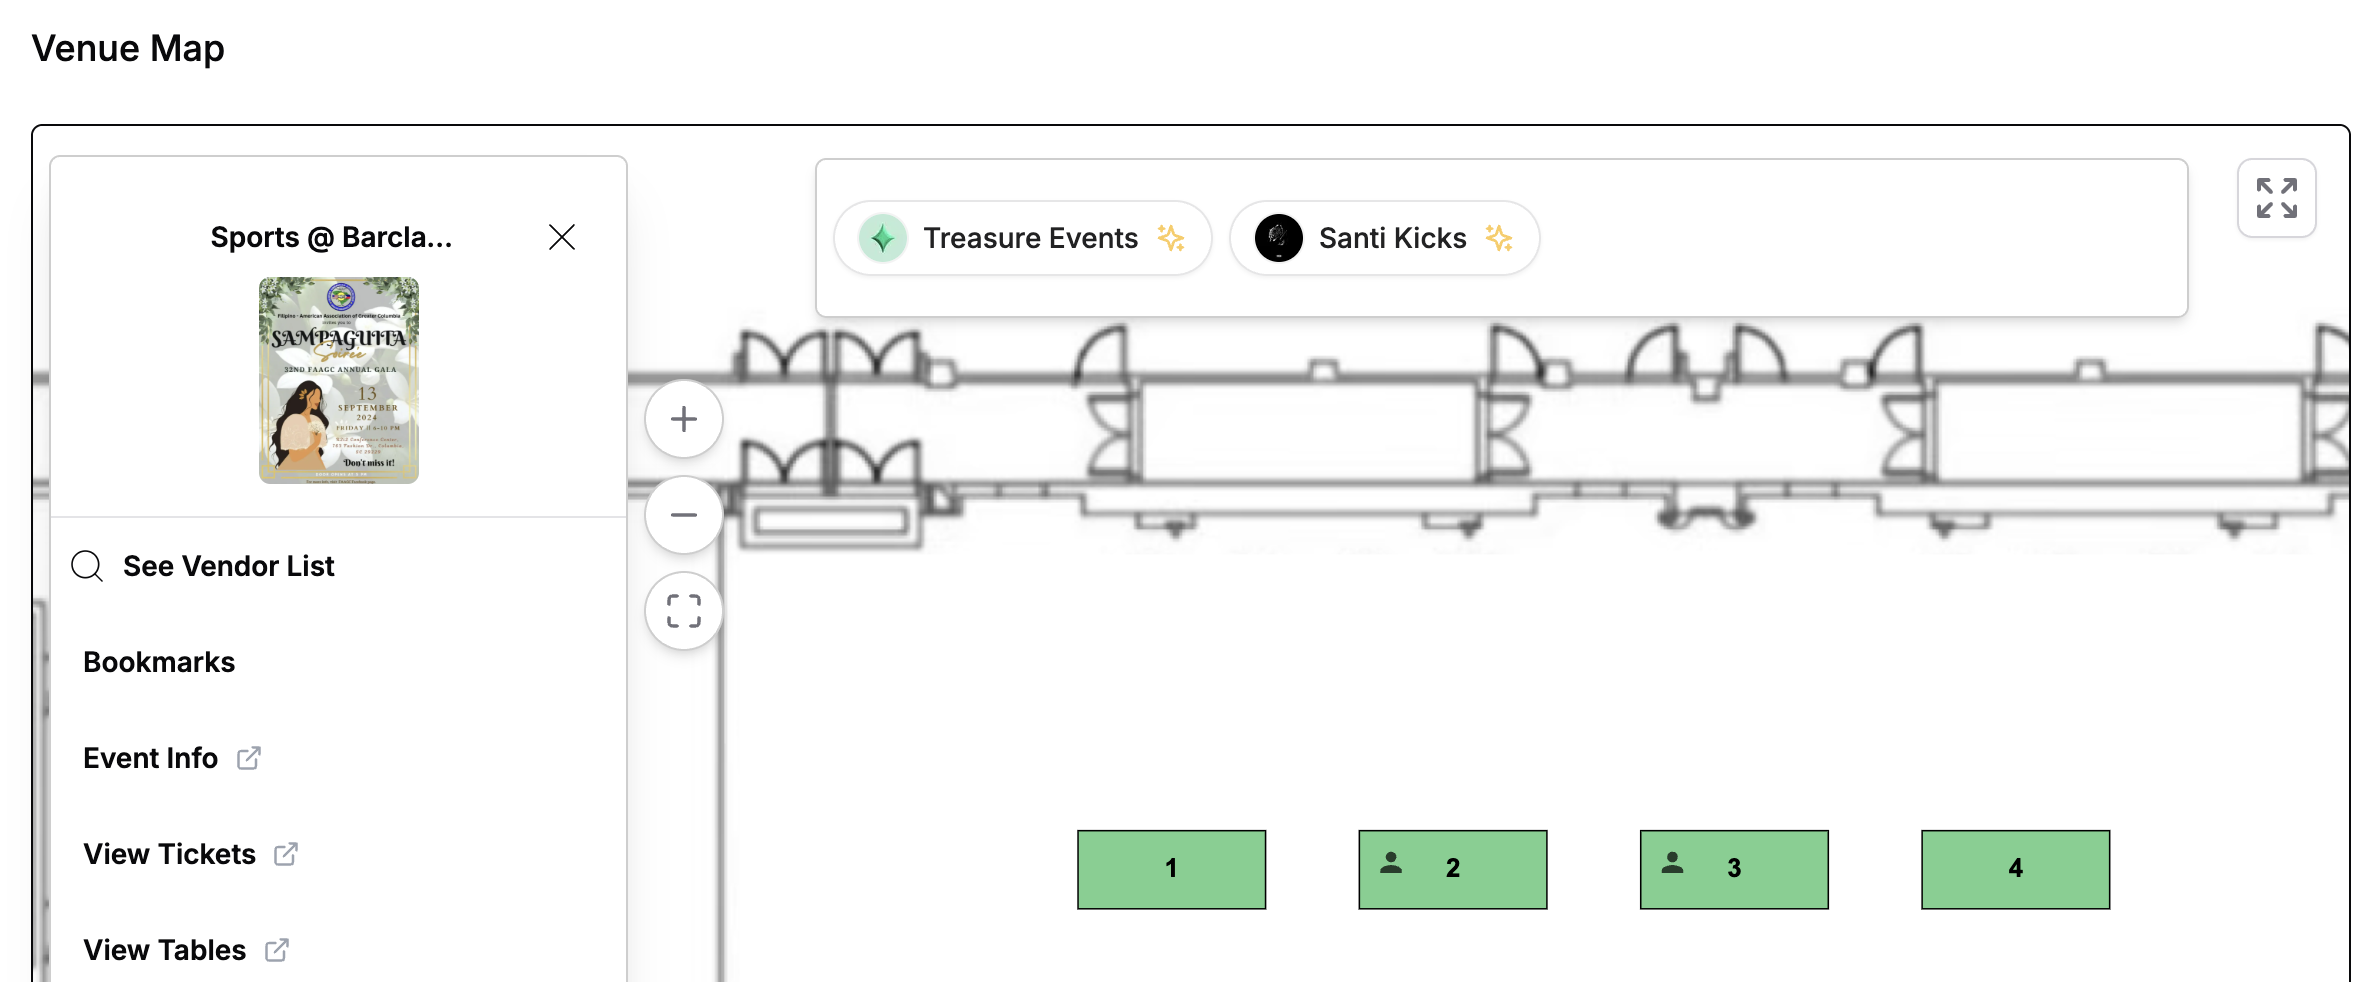
Your vendor highlights are now live! Remember that the order of your highlighted vendors can be changed at any time by following the steps above.